Still grinding away at it
Today marked the conclusion of week three of the project, and things are moving along steadily.
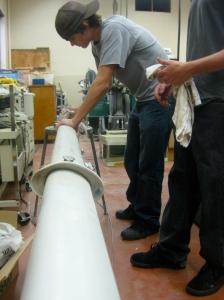
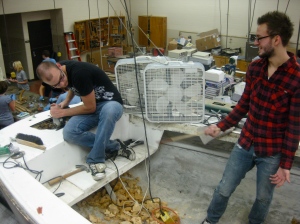
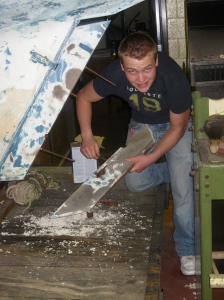
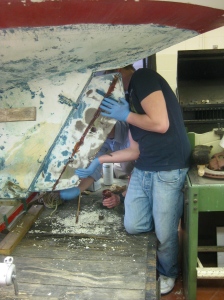
The class spent some time in the shop during the week sanding, cleaning the spars, and scrubbing deck hardware, while others continued to chip/gouge/pry/slice the remaining pour-in foam out of the aft area of the boat. We ultimately decided to remove a small bulkhead at the aft end of the cockpit to gain access to the foam from under the deck. Additionally, we opened up a 12″x12″ hole in the aft deck to improve access, which made a significant difference. Tony, Michael R., Nick and Alex S. chipped away at it, and Tony finally finished the job today, pulling out chunks of foam occupied by a colony of large black ants.
Opening up the hole in the aft deck confirmed what we already knew: the majority of the balsa core that strengthens the deck structure is soggy and rotten. That means it’s necessary to remove most of the top layer of fiberglass on the aft deck, scoop away the old balsa, and then re-glass the entire area, carefully fairing it before painting. I know there are at least two other areas of substantial core damage that will need to be addressed as well.
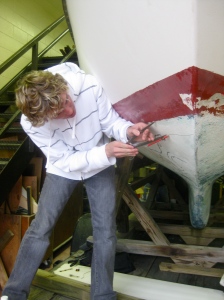
Michael D., Joey W. and Oliver S. completed the first step in preparing the topsides for sanding by transferring the bottom of the boot stripe (the horizontal red line at/near the waterline) 3″ lower. Doing so allows us to sand the topsides and boot stripe while maintaining a reference line that we can bring back up 3″ when the time comes to paint the new boot stripe.
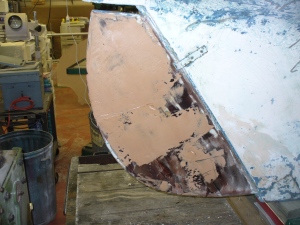
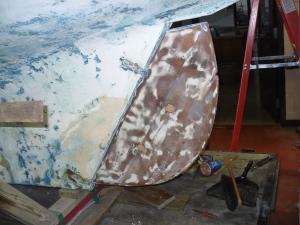
Matthew O. tackled the rudder repair Wednesday afternoon. Earlier, we had removed two of the three boards that comprise the rudder blade, leaving the primary board that attaches to the rudder post in place. The two pieces we removed had separated (if they were ever attached) from their surrounding joints, and a previous owner had attempted unsuccessfully to re-attach them with some kind of caulk. We removed the caulk and cleaned up the edges with a light sanding. Matthew O. wiped the mating surfaces with acetone while I mixed up some epoxy. We coated the raw edges in unthickened epoxy, then added thickener to the mix and bonded the pieces of rudder blade to each other, making sure that plenty of epoxy oozed out from the joints. We smoothed the excess and left the epoxy to set.
Today I sanded down the epoxy that had squeezed out of the joints, and gave the rudder a light sanding to prepare the surface for fairing with thickened epoxy. We used up our last little bit of hardener, so we had only enough epoxy to fill two holes in the blade, which allow access to threaded rods that support the blade, and give the top portion a coat of fairing compound. We’ll finish fairing next week when we have more materials. In the meantime, the rudder is looking good and inspires much more confidence than it did a few days ago.
Once again, I donned the full-face respirator and climbed into the cabin to finish sanding the sides and overhead. Sadly, I’ve discovered that it’s much more difficult to hold a 6″ RO sander over my head for any length of time than it used to be just a few short years ago! The good news is that this portion of the job is nearly over. There is only a small patch (that I forgot) that needs sanding. When that’s done, we are officially ready to begin reconstructing the cabin interior. I’ll be happy to be into reconstruction, which should begin next Friday.
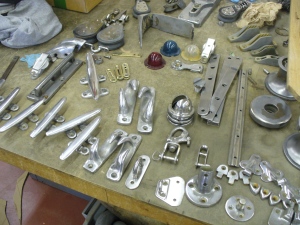
Nick and Alex S. spent much of the afternoon polishing the various pieces of deck hardware and rigging – winches, cleats, chainplates – and had a very shiny (and pretty) collection before too long. As Tony remarked, the boat will look like new when she’s finished.
We concluded the day’s work with a good cleaning of the boat and the shop. And then we did the most enjoyable thing of all…we spent half an hour sitting in the empty cockpit admiring our work and imagining the future. These are great kids.
You have a great team there. I’d be proud to have you guys work on mine. Wow. That Ensign will be better than new when you are done. I have Ensign 1387 and will be doing exactly what you are but without a great team! I will be back to check on progress.
David, Thanks for stopping by! Yes, they are great kids. Bring your Ensign on over, and we’ll get to work as soon as we finish this one. We’d love to follow your progress as well if you’re going to document it somewhere.
I frequent the forum plasticclassicforum.com which is a good resource for the uninitiated. A couple of posts of my Ensign, as yet not officially named.
Accessing a stepped mast.
http://plasticclassicforum.com/viewtopic.php?f=26&t=3652
Hurricane ike.
http://plasticclassicforum.com/viewtopic.php?f=20&t=4619
New bottom paint
http://plasticclassicforum.com/viewtopic.php?f=1&t=4235
Cold Kansas
http://plasticclassicforum.com/viewtopic.php?f=4&t=4111
I own a 1965 ensign and rebuilt the rudder exactly how the kids are doing it. My next project was the winches but I’m stumped on how to remove them. They have a cap to remove and then 2 bars seperated by a spring. Have you encountered this on the work boat?
Michael,
Our winches have a large slotted screw in the middle of the drum that holds the top of the winch in place. Removing the center screw allows that round top to come off, exposing the winch drum. There are two channels in the drum that run vertically and contain the pawls that create the ratcheting system. Each channel contains a spring in the center with a pawl above and below to engage the winch top and the winch base for cranking. Once the top is removed, the drum can be removed to expose the winch base and the mounting bolts.
Does this sound like your system? You might have different winches if not. Hope the explanation makes sense.
Thanks for checking in with us! If you subscribe to this blog, you will receive update notifications automatically. Click here to subscribe.
keep me posted on your progress